Tutorial: How to Create a Hyperlapse Video with Your Smartphone
In the realm of modern video production, hyperlapse videos have gained popularity for their ability to capture the passage of time and space in a visually captivating way. Unlike traditional timelapse videos, hyperlapse involves movement, adding a dynamic and engaging element to your footage. If you’re interested in creating a hyperlapse video with your smartphone, this comprehensive tutorial will guide you through the process, from planning to execution and editing.
What is a Hyperlapse Video?
A hyperlapse is a form of timelapse photography where the camera moves through space, creating a sense of motion along with the passage of time. This technique can be used to highlight the movement of people, cars, or even the changing landscape, making it a popular choice for creating engaging content on platforms like YouTube, Instagram, and TikTok.
Tools You’ll Need
- Smartphone: Almost any modern smartphone with a decent camera will work. However, a phone with optical image stabilization (OIS) and a high-resolution camera will yield better results.
- Tripod or Stabilizer: To ensure smooth footage, using a tripod or a smartphone stabilizer (gimbal) is highly recommended. This will help keep your shots steady and reduce jitter.
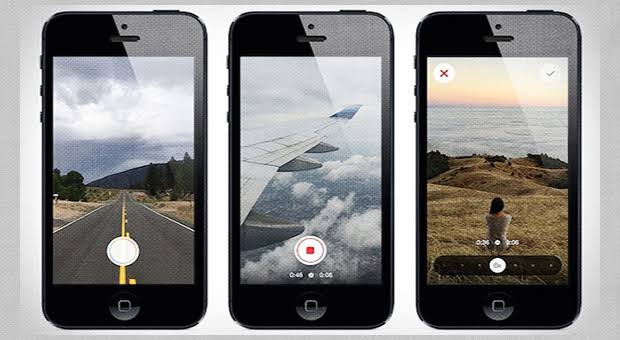
- Hyperlapse App: While many smartphones come with built-in hyperlapse features, there are also various apps available that provide enhanced controls and editing options. Examples include Hyperlapse from Instagram, Lapse It, and Microsoft Hyperlapse.
Planning Your Hyperlapse Video
- Choose Your Subject: Decide what you want to capture. Common subjects for hyperlapse videos include cityscapes, nature trails, or architectural landmarks. The movement in your video should contribute to the overall narrative or visual appeal.
- Plan Your Route: If your hyperlapse involves moving through a specific area, plan your route in advance. This will help you maintain a consistent pace and ensure that you cover the most interesting parts of your subject.
- Time of Day: Consider the lighting conditions. Early morning or late afternoon provides soft, warm light that can enhance your video. Avoid harsh midday sun which can create unwanted shadows and overexposure.
Setting Up Your Smartphone
- Mount Your Phone: Attach your smartphone to the tripod or stabilizer. Ensure it is securely fastened and level to prevent any unintended shifts during filming.
- Select Your Camera Settings: Open your camera app and select the appropriate settings. For hyperlapse, you’ll want a higher frame rate to capture smoother motion. If your app allows, set the resolution to the highest available setting.
- Enable Stabilization: If your smartphone has built-in image stabilization, ensure it is turned on. This feature will help reduce camera shake and keep your footage smooth.
Recording Your Hyperlapse Video
- Start Recording: Begin your hyperlapse by pressing the record button. Move your smartphone steadily along the planned route. Keep your movements smooth and consistent to ensure that the resulting footage is fluid and professional.
- Maintain Consistent Speed: Try to maintain a consistent speed while moving. Sudden changes in pace can disrupt the flow of the video and make it look jittery.
- Record for Sufficient Duration: Record for a longer duration than you think you’ll need. This gives you more flexibility during editing to trim and adjust the video to your liking.
Editing Your Hyperlapse Video
- Transfer Footage to Your Computer or Editing App: After recording, transfer your video to your computer or mobile device for editing. Use video editing software such as Adobe Premiere Pro, Final Cut Pro, or mobile apps like iMovie or Adobe Premiere Rush.
- Import Your Footage: Open your chosen video editing software and import your hyperlapse footage. Place it on the timeline for editing.
- Adjust Speed and Duration: Use your editing software to adjust the speed of your video. Speeding up the footage will create the hyperlapse effect. You can usually find a speed adjustment tool in the editing software’s controls.
- Stabilize Your Footage: Even with a stabilizer, some minor jitters might appear in your footage. Most editing software has built-in stabilization tools that can smooth out any remaining shakes.
- Apply Color Correction and Effects: Enhance your video with color correction to adjust brightness, contrast, and saturation. You can also add effects or transitions to make your video more engaging.
- Add Music and Text: Adding background music and text overlays can enhance the storytelling aspect of your hyperlapse video. Choose music that complements the mood and pace of your footage.
- Export Your Video: Once you’re satisfied with your edits, export your video in the desired format and resolution. Ensure you choose settings that maintain the quality of your hyperlapse footage.
Tips for a Successful Hyperlapse
- Use a Stabilizer: Even with careful movement, a stabilizer can greatly enhance the smoothness of your footage. Consider investing in a gimbal for professional results.
- Keep Your Smartphone Steady: Minimize sudden movements and try to keep your phone as steady as possible. Small, consistent movements will yield better results.
- Experiment with Angles and Perspectives: Don’t be afraid to try different angles and perspectives. Unique viewpoints can add an interesting dimension to your hyperlapse video.
- Practice Patience: Creating a high-quality hyperlapse video takes time and practice. Don’t be discouraged if your first few attempts don’t turn out perfectly.
- Check App Settings: If you’re using a dedicated hyperlapse app, explore its settings to take advantage of features like adjustable speed, stabilization, and in-app editing tools.
Conclusion
Creating a hyperlapse video with your smartphone is a rewarding process that combines creativity with technical skill. By following this tutorial, you can produce stunning hyperlapse footage that captures the dynamic passage of time and space. From planning and shooting to editing and finalizing your video, each step contributes to the overall quality of your hyperlapse. With practice and attention to detail, you can create engaging and visually striking videos that stand out on social media and beyond.
Whether you’re documenting a cityscape, capturing a journey through nature, or simply experimenting with new video techniques, a well-executed hyperlapse can add a unique touch to your content and showcase your creative vision.